If you are looking to change the appearance of your website using CSS, or if a tutorial has asked you to add a CSS code to your webpage, then keep reading this guide to add custom CSS in WordPress.
Method 1: Add Custom CSS in WordPress Via Theme Customizer
Adding custom CSS in WordPress is a super easy procedure and does not require the installation of any plugins whatsoever.
1. In WordPress, click on Appearance > Customize from the left sidebar menu
TEXT AD1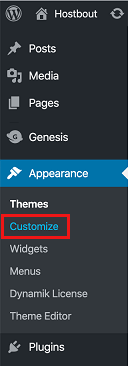
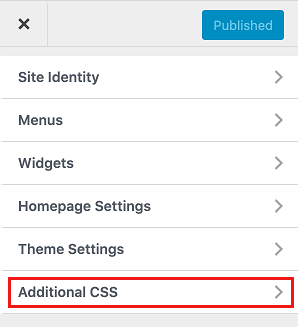
2. On the next screen, you will be shown a bunch of theme customization options. Click on Additional CSS option from the left sidebar on this screen
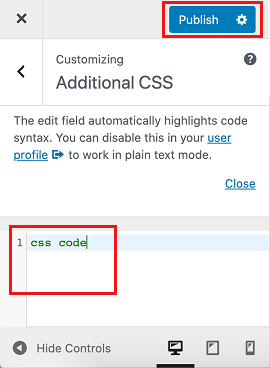
3. Add CSS code and then click on the Publish button to save your code.
That’s it! As we mentioned earlier, adding CSS code in WordPress is a very simple process.
Downsides to Adding Custom CSS This Way?
While adding custom CSS using the theme customizer is easy and efficient, there is one downside.
The CSS code you enter will be linked to the current theme you are using on your website.
Whenever you decide to switch themes, you will need to copy the custom CSS from the old theme and then follow steps 1-3 to paste it into the new theme.
For most users this is a very minor nuisance, hence this is the recommended method to add custom CSS in WordPress.
Method 2: Add Custom CSS Via a Plugin
If you want your custom CSS code to remain intact even after you change themes, then you can make use of a plugin to add custom CSS in WordPress.
TEXT AD2A great plugin to do this is called Simple Custom CSS and JS.
1. Click on Plugins > Add New
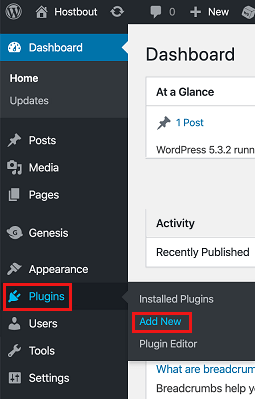
2. Search for the Simple Custom CSS and JS plugin and click on the Install and Activate buttons to install it.
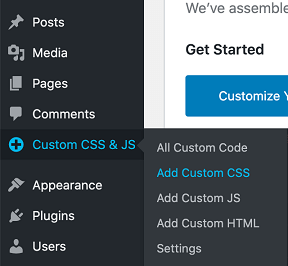
3. Once the plugin is installed, click on Custom CSS & JS > Add Custom CSS from the left sidebar
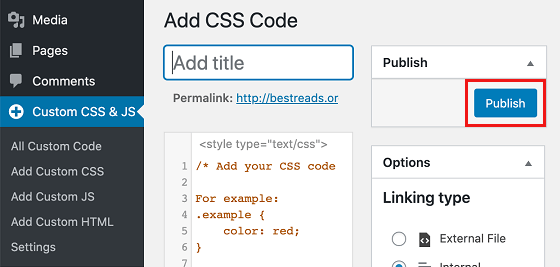
4. Add the CSS code and then click on the Publish button
That’s it for this article! We hope this article helped you out.