Typically, a navigation menu only contains plain text links. If you want to spice up your navigation menu by adding image icons next to text links, then keep reading. We will be showing two different methods to add images to WordPress navigation menu.
Add Images to WordPress Navigation Menu
Most websites have only text links on their navigation menus, however, to make your website stand out from your competitors you may want to add images or add social media icons to the navigation menu.
If you are wondering what images on your navigation menu would look like, here is an example.
TEXT AD1
As you can see this makes items on your navigation menu significantly more visible, which can increase clicks.
For this tutorial we will be showing you two different methods to add images to WordPress Navigation Menu.
The first method involves using a plugin and is recommended for beginners and those with limited coding knowledge.
The second method uses CSS to add the image icons to your navigation menu.
Method #1: Using a Plugin
Here is the step-by-step tutorial to add images to WordPress navigation menu using a plugin.
1. Install Menu Image Plugin
First you need to install the Menu Image plugin. In the WordPress dashboard, click on Plugins > Add New.
Now search for the Menu Image plugin and then click on the Install button and then the Activate button to install the plugin to your website.
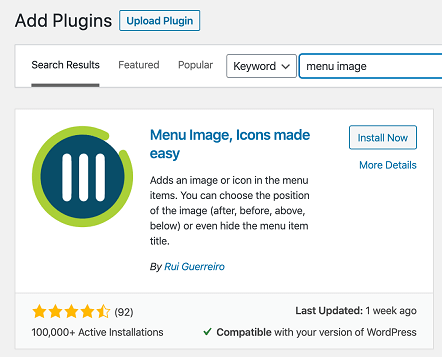
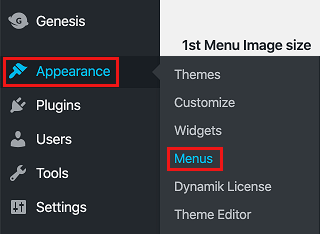
2. Once the plugin has been installed, click on Appearance > Menus
3. Add Image Icon
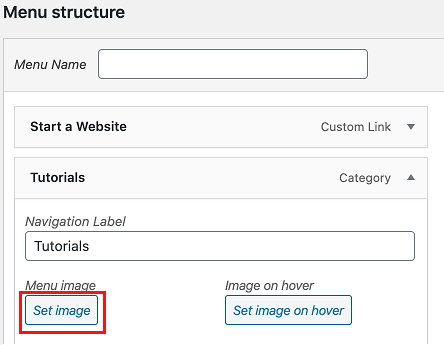
Simply click on the menu item you want to add an image to, in order to expand it. Once you have clicked on the menu item, you will notice a wide range of options.
To add an image icon, simply click on the Set Image button and then upload the image icon you would like to add next to this menu item.
4. Customize Icon Size and Location
After uploading the image icon, you can choose the icon size to be displayed. Typically for navigation menus you will want to choose one of the three following sizes: 24 x 24, 36 x 36, 48 x 48.
You can also choose to add a separate icon that should be displayed on hover, or you can simply leave this option blank.
Now the main setting you want to customize is the location of the image icon. You can choose to add the image icon before, after, above or below the menu item text.
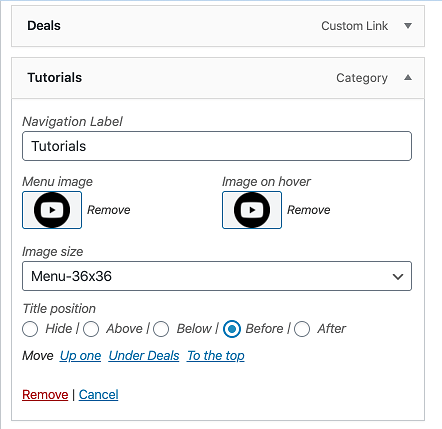
You can even choose to completely eliminate the text and only display the image icon on your navigation menu. However, we don’t recommend doing this, since an image without any context may be confusing for readers.
5. Repeat for Other Menu Icons
Once you have added your first image icon, repeat steps 3 and 4 for all remaining image icons you would like to add to your navigation menu.
6. Click on Save Menu
After you have added all the image icons, click on the Save Menu button to save your changes.
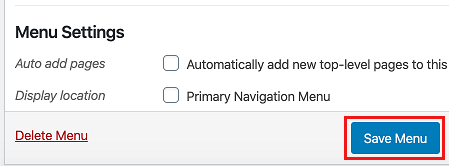
Now when you visit your website, you should be able to see that you have image icons displayed next to each navigation menu item.
Method #2: Using CSS
In case the first method did not work, or you prefer not to use a plugin, you can make use of the second method to add images to WordPress navigation menu.
1. Upload Image Icons to Media Library
The first step in this method is to add all the image icons to your media library.
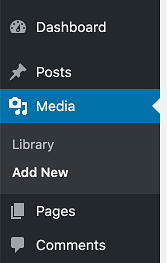
To do this, click on Media > Add New from the left sidebar menu and then upload all the image icons.
2. Click on Appearance > Menus
After adding all the images, click on Appearance > Menus from the left sidebar menu.

3. Expand Screen Options and Enable CSS Classes
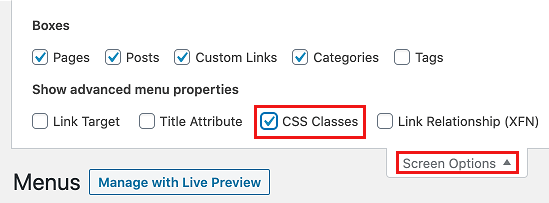
On this screen, click on the Screen Options dropdown, which is located near the top right corner of your screen.
After the screen options expand, check the CSS classes options, which is located under the ‘Show Advanced Menu properties’ subheading.
4. Open Menu Item, name CSS class
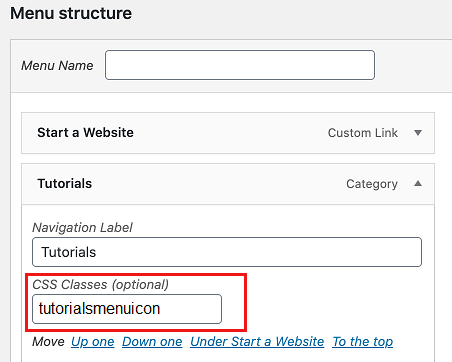
Now, simply click on a menu item to expand it. You will notice a new option, called CSS classes.
Enter a CSS class name here. The best naming convention is the menu item name followed by menicon.
For example, for the tutorials menu icon we will be entering ‘tutorialsmenuicon’ as the name.
5. Add CSS Code to Website
Now you need to add a CSS code to your website, in order to display the icon in your navigation menu.
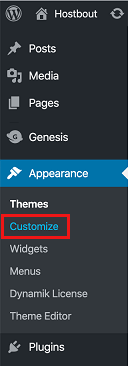
First click on Appearance > Customize from the left sidebar menu.
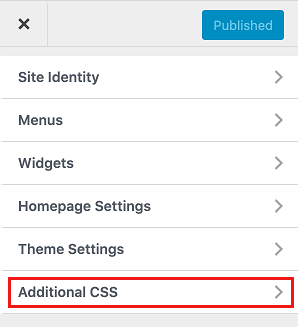
Next click on Additional CSS option.
Add the following CSS code:
.cssname {
background-image: url(‘http://www.example.com/wp-content/uploads/2020/04/icon.png’);
background-repeat: no-repeat;
background-position: left;
padding-left: 5px;
}
Note: You need to replace cssname with the name you gave your menu item and replace the url with the image icon’s URL.
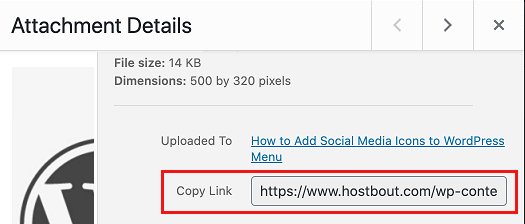
To find the image icon’s URL, click on Media from the left sidebar menu.
You will see a list of all media items, click on the image icon and then click on Copy Link to copy the image icon’s URL.
6. Repeat for Other Menu Items
Now you need to repeat steps 4 and 5 for all other menu items.
Make sure you give each menu item a unique CSS name and for step 5, you enter the specific image URL for that icon.
That’s it for this article! We hope this tutorial was able to help you add images to WordPress navigation menus.