Keeping visitors coming back to your website is probably the hardest part of web marketing. Push Notifications are one of the few highly effective tools that help you achieve returning visitors. In this article we will be showing you how to add push notifications to WordPress website.
Do You Need to Add Push Notifications?
Before getting started, let’s discuss what push notifications are and whether your website needs them.
What Are Push Notifications?
TEXT AD1Even if you haven’t heard of push notifications before, chances are you have most likely seen them.
An example of push notifications is apps on our smartphones, which use push notifications to notify us whenever new content is available. If you receive a message on Facebook, you will get a push notification informing you of that message.
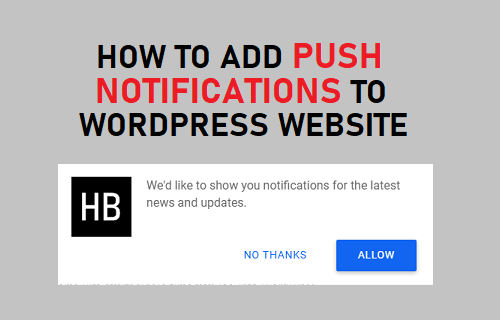
Desktop push notifications also exist. Here is an example of what a push notification looks like on a computer.

Do you Need Them?
Push notifications are a highly effective marketing technique, since users tend to instantly pick up their phones or look at their computers, whenever they receive a notification.
Push notifications are a great way to drive traffic to your website and build a loyal fanbase if used correctly.
Here’s a summary of why you should use push notifications:
- Push notifications have a higher CTR (click through rate) compared to email subscription
- Are a convenient way for users to subscribe, since it requires no email or other information.
- Substantially increase traffic from returning visitors
- Are easy to implement
The only downside to using push notifications is that you may end up annoying users away from your website if you use them incorrectly.
If you are sending multiple push notifications to subscribers every day, then chances are they will unsubscribe.
Only send notifications when you have new interesting content available. This way your subscribers stay interested and are likely to stay subscribed for a longer time, which in turn will lead to them returning to your website frequently.
Add Push Notifications to WordPress Website
The easiest way to add push notifications to your WordPress website, is by using a plugin.
TEXT AD2Some popular plugins for push notifications include OneSignal, PushEngage and PushAssist.
While all three plugins are great for push notifications, OneSignal’s free plan allows you to send notifications to up to 30,000 subscribers, while the other two only allow 2,500 and 3,000 respectively.
Hence, we will be showing you how to add push notifications to WordPress site, using OneSignal.
The setup is a three-step process:
- Install One Signal Plugin
- Create OneSignal Account
- Create a Web Push App
Let’s get started with the details.
1. Install OneSignal Plugin
The first step is to log into WordPress and install the OneSignal plugin. In case you don’t know how to install plugins, here’s a step-by-step guide.
1.1. Click on Plugins > Add New
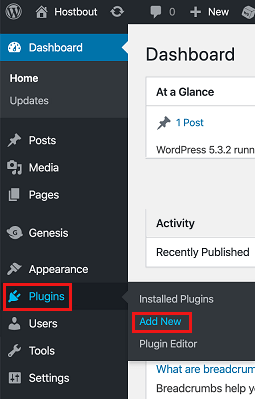
In WordPress, click on Plugins > Add New from the left sidebar menu. (See image below)
1.2. Search for OneSignal and Install the Plugin
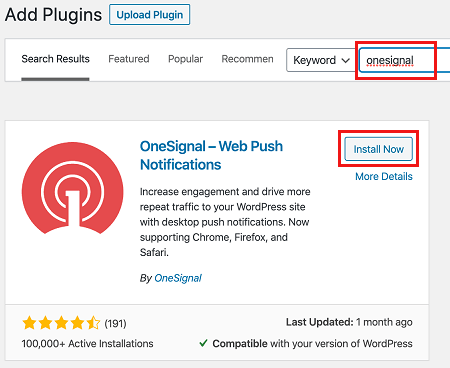
Now on the add plugins page, search for OneSignal in the search bar. Click on Install Now and then Activate to install the plugin on your website.
2. Create OneSignal Account
Once you have installed the OneSignal plugin on your website, the next step is to create a OneSignal account.
2.1. Visit the OneSignal website and Sign Up
The first step is to visit the OneSignal website and sign up for an account. Click on Sign Up from the top right and then fill in the relevant details to create an account.
2.2. Verify Email
After you have gone ahead and created an account, the next step is to verify your email. Login to the email you just provided OneSignal and verify your account.
3. Create a Web Push App
Now that you have successfully verified your email, the next step is to create a web push app on OneSignal’s website.
3.1. Name the app and choose Web Push
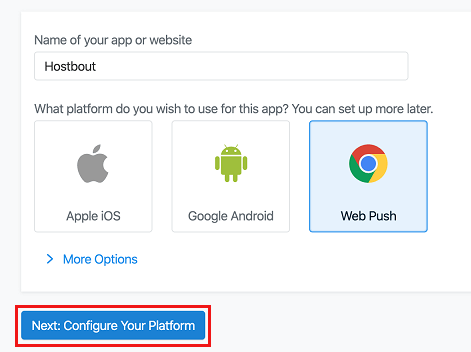
After verifying your email, you should end up on the screen in the image below. On this screen, name your app, choose Web Push and then click on the Next: Configure Your Platform button.
Note: If you don’t end up on this screen, simply click on New App/Website from the OneSignal dashboard.
3.2. Choose Integration Method
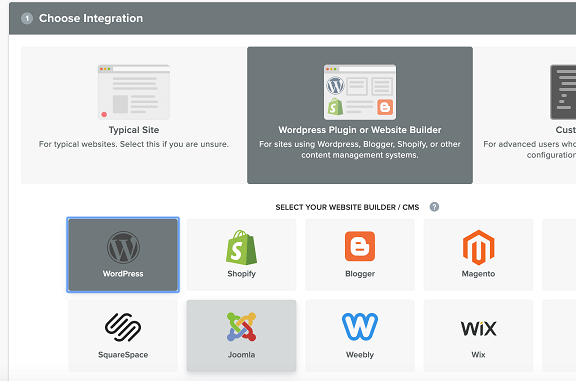
Now you will be asked how you want to integrate OneSignal. Select the WordPress Plugin or Website Builder Option and then click on WordPress.
3.3. Enter Website Details
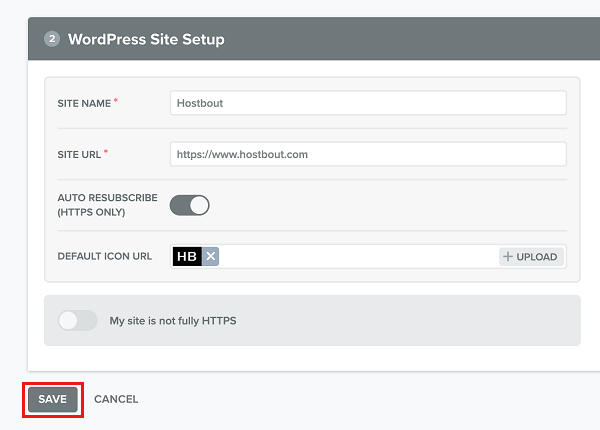
After following step 3.2, scroll down and you will see a section asking you to enter your website details.
Enter your website name, URL, and upload your site’s favicon.
3.4. Click Save and Enter App ID and API Keys in WordPress
After clicking on save, you will be shown a site-specific app ID and API keys. You need to enter the app ID and API keys into WordPress.
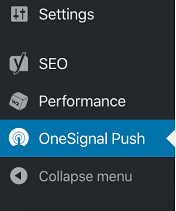
In WordPress, click on the OneSignal Push tab from the left sidebar menu (See image below).
On the OneSignal plugin page, click on the Configuration tab and then paste the App ID and API keys there.
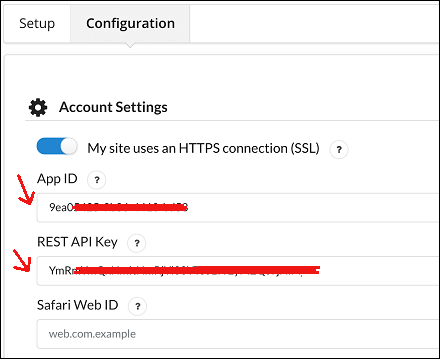
Once you have entered the app ID and API keys, scroll down and click Save.
We will be looking at customization settings later, so skip those for now.
3.5. Get a Safari Web ID
As you must have noticed when you entered in the keys, a section called Safari Web ID was empty.
In order to get a Safari Web ID, you need to do the following:
3.5.1. Go back to OneSignal and click on Finish or Settings from the top menu
![]()
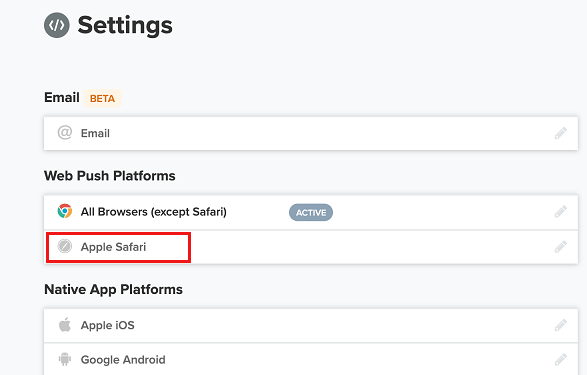
3.5.2. Click on Apple Safari, in the Web Push Platforms section
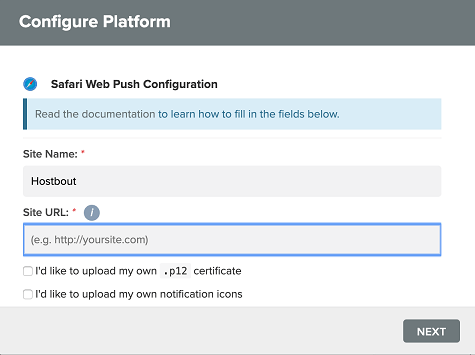
3.5.3. On the popup, enter a site name and your website’s URL and then click on Next
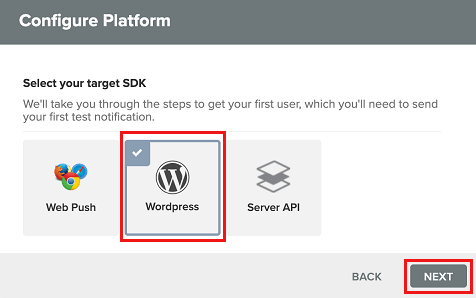
3.5.4. Next click on WordPress and then click On Next
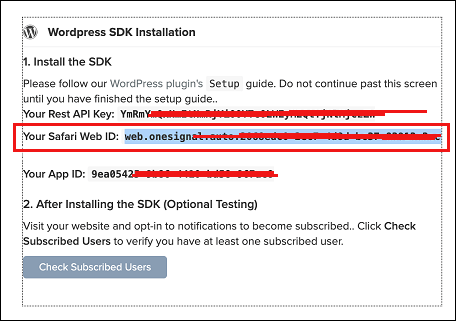
3.5.5. Now copy the Safari Web ID and paste it into WordPress
Customize the Push Notifications
Now that you have successfully added push notifications to WordPress, you can follow the steps below if you would like to customize the web notifications.
Simply head over to WordPress, click on OneSignal Push from the left sidebar and then click on the Configuration tab to change any of the following settings:
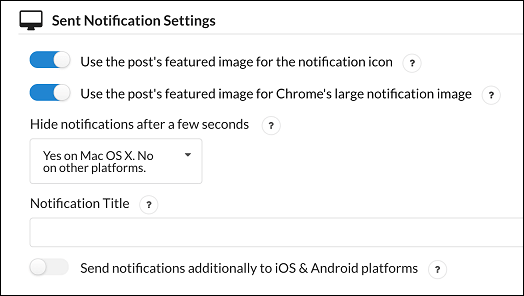
Change Sent Notification Settings
In this section you can choose whether you want to use the post’s featured image for notification icons, whether you want to hide notifications after a few seconds and the notification title.
Customize Subscription Bell
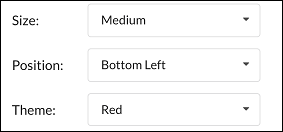
Next you will see a section titled Prompt Settings & Subscription Bell.
Here you can choose the bell’s size, position and theme (See image below).
You can also customize the text shown by the subscription bell.
Customize Prompt
Scrolling down further, you will see a section titled Prompt Customization. Here you can customize the text shown by the prompt.
Other Customizations
You can also customize the Welcome notification that is sent to users as soon as they subscribe.
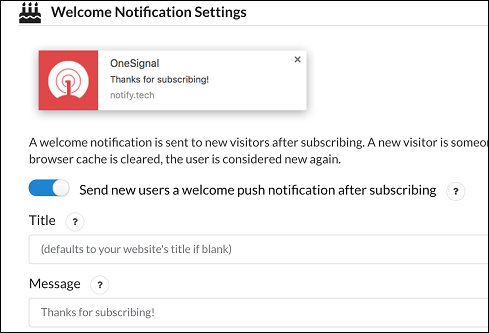
OneSignal gives you the option to disable the welcome notification and also the option to customize the text of the welcome notification.
One other customization we recommend, is disabling the Automatically send a push notification setting for whenever you publish a post.

If you publish posts quite frequently then leaving this setting turned on, can make your subscribers annoyed and eventually force them to unsubscribe.
You can specifically choose which posts should send a push notification in the WordPress post editor (See image below).
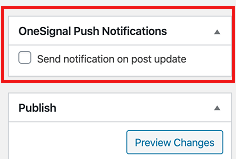
Doing this makes sure you are only sending a push notification when you have interesting content available on your website, which will keep your subscribers entertained.