With the growing use of smartphone devices, you may want to move your search bar from the sidebar to the navigation menu, so that it is easily accessible for mobile users. Keep reading to find out how to add a search bar to WordPress menu.

Add a Search Bar to WordPress Menu
If your website has a lot of content, then it can become very difficult for readers to find a specific article.
Adding a search bar can eliminate this problem, as the reader can simply search for the desired article using the search bar.
WordPress by default will allow you to easily add a search bar to the sidebar and other widget areas.
TEXT AD1However, as mentioned earlier, on smartphones the sidebar appears after the content (instead of with the content), making the search bar pretty useless for smartphone users.
Hence, we will be showing a very easy technique to add a search bar to WordPress menu.
For this tutorial, we will be using a free plugin called Ivory Search.
1. In WordPress, click on Plugins > Add New from the left sidebar menu.
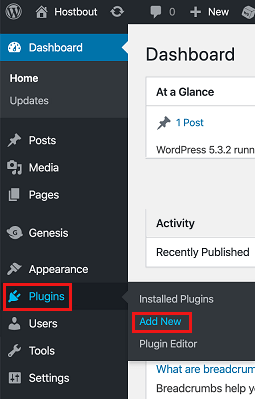
2. Search for the Ivory Search plugin, then click Install and Activate to install the plugin.

3. Once the plugin is installed, click on Ivory Search from the left sidebar menu and then choose whether you want to receive notifications from the plugin
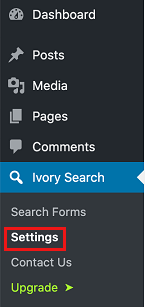
4. Now click on Ivory Search > Settings from the left-sidebar menu
5. Click on Menu Search and then toggle ON the menu you want the search bar to be displayed on
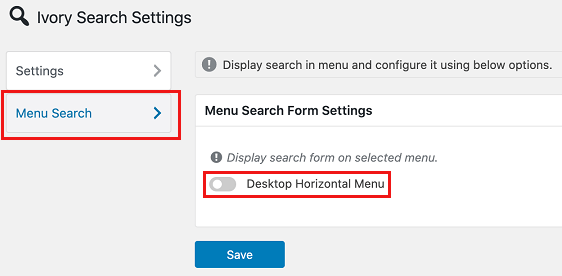
6. Click on the Save button
Now when you visit your website, you will notice the search bar appearing.
Customize Search Bar
The best part about the Ivory Search plugin is that it comes loaded with a bunch of customization options.
Here is how to customize the search bar displayed by the plugin:
Change Appearance of Search Bar in Menu
1. Click on Ivory Search > Settings

2. Click on Menu Search
3. You can choose from the following types of search options: default, dropdown, sliding, full width, pop-up.
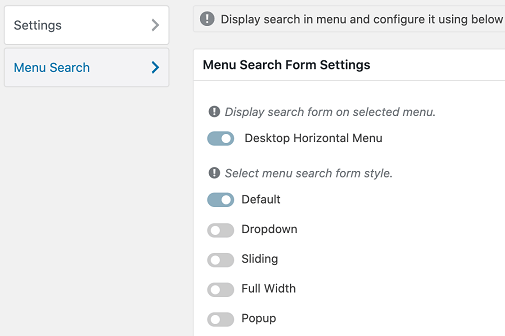
Apart from default, all the other options display a search icon, instead of a search bar.
Change What Appears in the Search
Another customization you may want to make, is changing what appears when readers use the search bar.
You can choose to exclude specific posts/pages from appearing in the search.
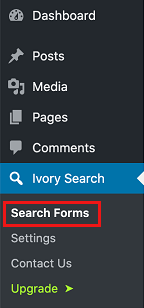
1. Click on Ivory Search > Search Forms
2. Click on the Includes Tab
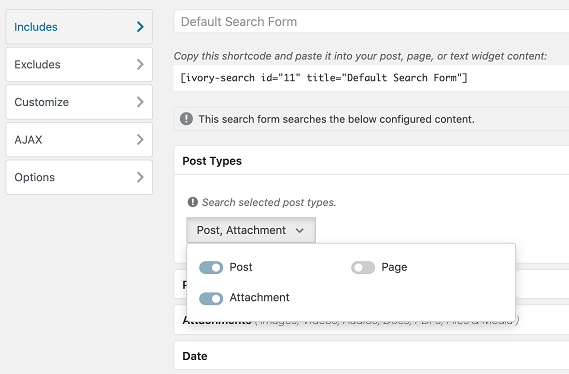
Here you can choose what is included in the search options.
For example, let’s say you only want readers to allow only posts to be searched, but not pages.
You would click on Post Types and then toggle off Pages to exclude them from the search.
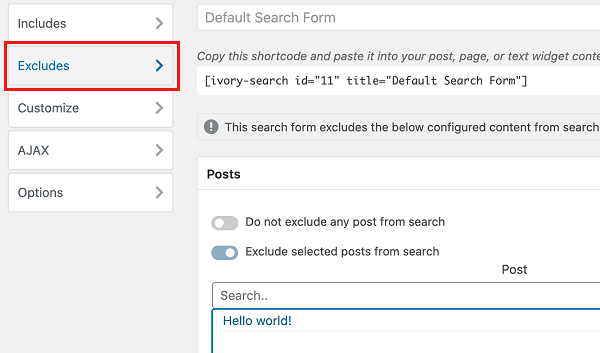
If you want to exclude only a specific post or page from the search, while allowing all other pages and posts, then click on the Excludes tab.
Now click on the Posts tab (if you want to exclude a post) and then toggle on exclude selected posts option. Now select the posts you want to exclude from the list.
Change Appearance
To change the appearance of the search bar:
1. Click on the Customize tab.
2. Toggle on the Enable Search From Customization option and then click on Save
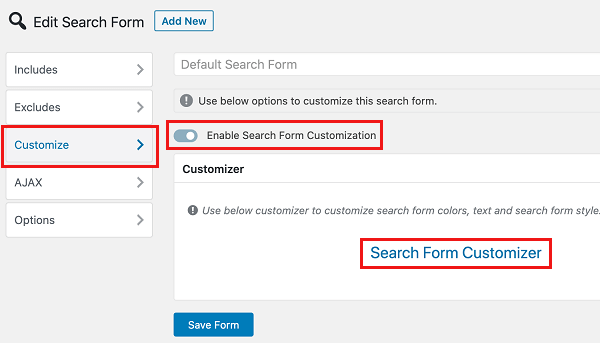
3. Click on the Search Form Customizer Link (See image above)
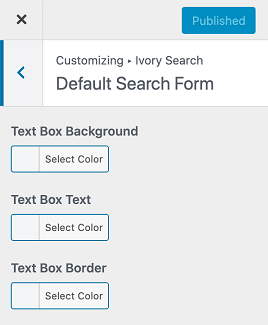
4. Now you can change things, like the background colour, box appearance and much more to your preference.
Other Customizations
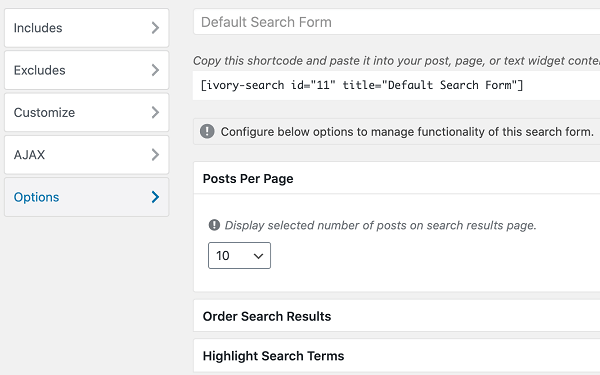
Click on the Options tab to make other customizations, like the number of posts that appear per search page, how the posts are ordered, etc.
That’s it for this article! We hope this article helped you out.