A sticky navigation menu stays with the reader as they scroll down, which can tremendously increase clicks on menu items. Hence you may want to create a sticky navigation menu in WordPress and in this article, we will be showing you two different methods to add a sticky navigation menu to your website.
Should you Create a Sticky Navigation Menu in WordPress?
A traditional navigation menu stays affixed at the top of a website and disappears as soon as the user scrolls down to read the content.
Sticky navigation menus as mentioned earlier stay with the reader as they scroll down.
TEXT AD1Sticky navigation menus have started to quickly gain popularity and a lot of themes even give the option to enable them.
But should you be adding a sticky navigation menu to your WordPress website?
The main advantages that sticky menus offer is that they can lead to an increase in clicks on menu items. Increased clicks on menu items, means that readers will be spending more time on your website, which means metrics like bounce rate, pageviews, and time on site will all improve.
A disadvantage of sticky menus is that they may be seen as annoying by readers, who want to focus only on the content they are reader.
Hence it makes sense to experiment and try out sticky menus for your WordPress website and see if they have a net positive effect.
If your theme does not have the option to create a sticky navigation menu, then you can follow the two methods in this post.
Method #1: Using CSS Code
For the first method, you need to add a CSS code to your website. If you are uncomfortable working with CSS code, then you can follow the second method, which makes use of a plugin.
Before adding the CSS code, you need to retrieve the CSS class ID of your navigation menu. Here’s how to do this:
1. Visit your website and right click on the navigation menu (See image below).
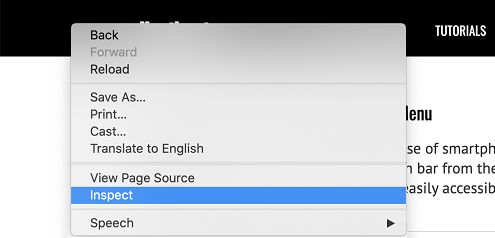
2. Click on Inspect (or Inspect Element) from the pop-up (See image above).
Now if you correctly right clicked on your menu, you will see your navigation menu highlighted in the left pane. (See image below).
TEXT AD23. Note down the CSS class ID of your navigation menu, which is visible in the right pane.
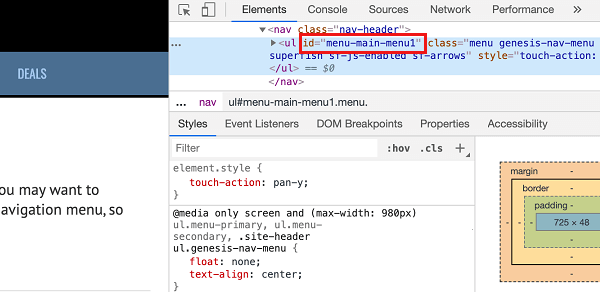
In the image above, I would note down menu-main-menu1.
4. Now login to WordPress and click on Appearance > Customize from the left sidebar menu
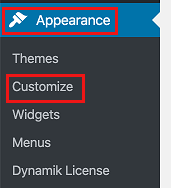
5. Click on Additional CSS
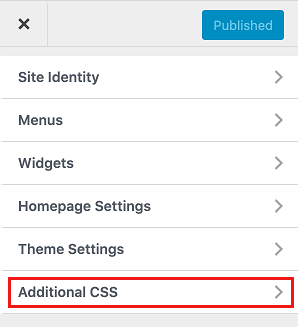
6. Add the following CSS code
#website-navbar {
background:#fff;
height:60px;
z-index:170;
margin:0 auto;
border-bottom:1px solid #dadada;
width:100%;
position:fixed;
top:0;
left:0;
right:0;
text-align: center;
}
Make sure you replace the text “website-navbar” with the CSS class ID of your navbar, that you noted down in step 3.
I noted down menu-main-menu1, so I would replace “website-navbar” with “menu-main-menu1”.
7. Click on the Publish button
Now when you refresh your website, you will notice that the navigation menu has become sticky.
Method #2: Using a Plugin
The second method involves using a plugin and takes out the hassle of having to manually enter in CSS code. All you have to do is download the plugin, tweak a few settings and you’re good to go!
For this tutorial we will be using a plugin called Sticky Menu (or Anything!) on Scroll.
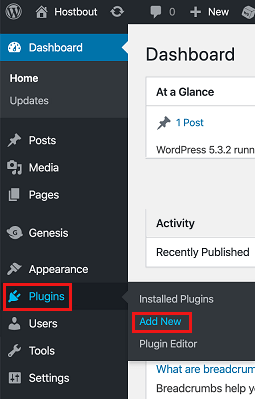
1. In WordPress, click on Plugins > Add New
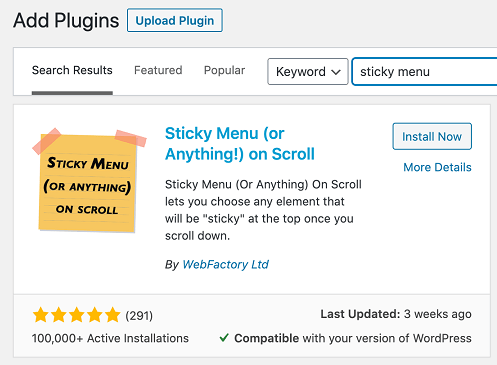
2. Search for the Sticky Menu (or Anything!) on Scroll plugin and then click on Install Now and then Activate
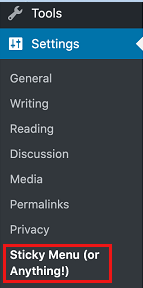
3. Once the plugin is installed, click on Settings > Sticky Menu (or Anything!)
You now need to retrieve the CSS class name for your navigation menu.
3.1. Visit your website and right click on the navigation menu (See image below).

3.2. Click on Inspect (or Inspect Element) from the pop-up (See image above).
3.3. Note down the CSS class ID of your navigation menu, which is visible in the right pane.

4. Enter the CSS class ID you noted down into the Sticky Element text box (See image below).
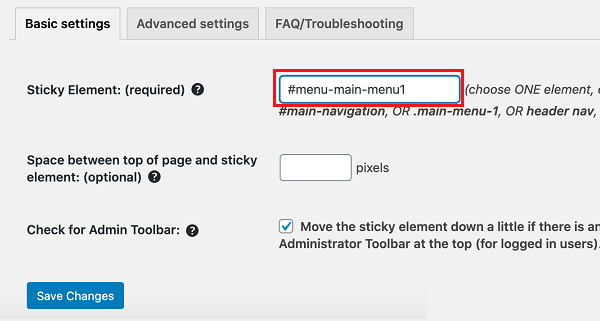
5. Click on Save Changes
Now visit your website, hit the refresh icon and you will see the menu has now become sticky.