Manually updating WordPress can be a cumbersome task, especially if you are managing multiple websites. For this reason, you may be looking for a technique to enable automatic updates in WordPress. Luckily in just a few simple steps you can setup your website to automatically update WordPress.
Things You Need to Consider Before Enabling Automatic Updates
Before proceeding ahead with the methods to enable automatic WordPress updates, it is recommended that you have automatic backups setup for your website.
Automatic backups are recommended in case something goes wrong with the update, and the update ends up breaking your website.
TEXT AD1In situations like these, if you have an automatic backup system in place, you can simply revert back to a previous backup. Without an automatic backup system, you run the risk of losing your website data in emergency situations.
Once you have automatic backups setup, you need to decide which one of the following methods you want to use to enable automatic updates in WordPress:
- Using a Plugin
- Adding Code to wp-config.php file
We recommend using the first method, however if you are uncomfortable with using a plugin you can make use of the second method which involves editing the wp-config.php file.
Method #1: Enable Automatic Updates in WordPress Using a Plugin
The easiest method to enable automatic updates in WordPress is by using a plugin.
This removes all the hassle of having to edit php files yourself and instead just involves clicking a few buttons!
We will be using a free plugin called Easy Updates Manager.
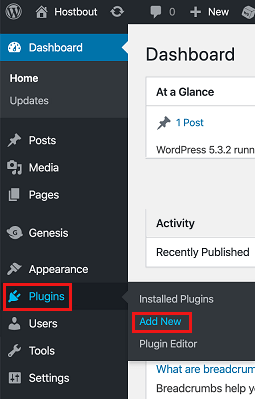
1. In the WordPress Dashboard click on Plugins > Add New from the left sidebar menu
2. Now search for Easy Updates Manager plugin
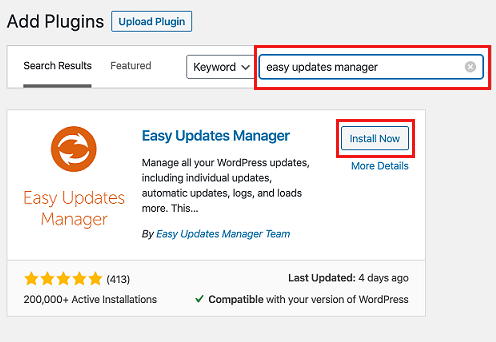
3. Click on Install Now to install the plugin, then click on Activate
4. Now from the left side menu, click on Updates Options
TEXT AD2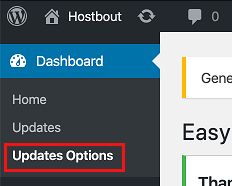
5. Next click on Auto update all releases under WordPress Core Updates option
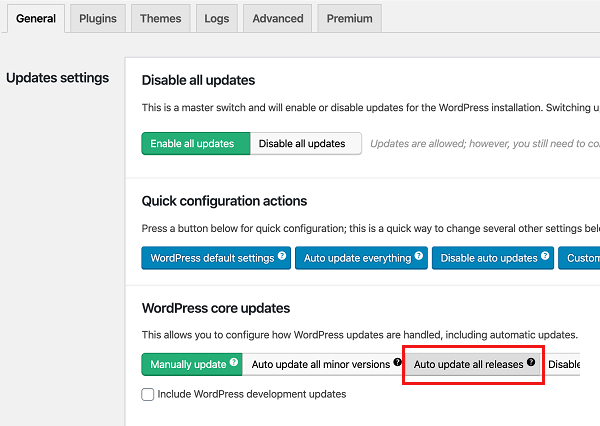
That’s it. From now on all WordPress updates will be automatically installed.
Method #2: Enable Automatic Updates in WordPress Through wp-config.php File
While using a plugin is the easiest method to enable automatic updates, some users don’t like using plugins and prefer doing as many things as possible without the use of plugins.
Another method to enable automatic updates in WordPress is by editing the wp-config.php and functions.php files.
Note: Before proceeding with the steps below, it is recommended that you make a backup of your entire site.
1. Open the wpconfig.php file and add the following code:
define( ‘WP_AUTO_UPDATE_CORE’, true );
The code above enables all updates for every single WordPress release including development and nightly updates.
Since most users do not want development and nightly updates (only want the important stable updates) the code below will make sure that only the major updates are installed automatically.
Be careful though, the code below should be added to your functions.php file and NOT the wpconfig.php file.
2. Open the functions.php file and add the following code
add_filter( ‘allow_dev_auto_core_updates’, ‘__return_false’ );
That’s it! Your website will now automatically download all future WordPress updates.