Most users opt to use 1-click installers like Softaculous to install WordPress. While these services are easy to use, you may want to install WordPress manually with cPanel, since services like Softaculous do not allow you to install WordPress on the free version.
Install WordPress on cPanel Manually
A lot of beginners are scared to install WordPress manually, after hearing terms like databases and file manager and hence choose to use 1-click installers.
While there is nothing wrong with using 1-click installers, installing WordPress manually is not difficult at all and is in fact a helpful learning process that can be useful when you upgrade to a VPS or dedicated server.
TEXT AD1As mentioned above, you may also want to install WordPress without Softaculous, because you received an error stating ‘WordPress cannot be installed in the free version of Softaculous’.
To make this guide easy to follow along, we have split the process up into 5 simple steps:
- Download WordPress
- Upload WordPress to cPanel
- Move WordPress Files
- Create a Database
- Complete WordPress Installation
Let’s get started with the procedure!
If you prefer a text tutorial, keep reading below.
Step 1: Download WordPress
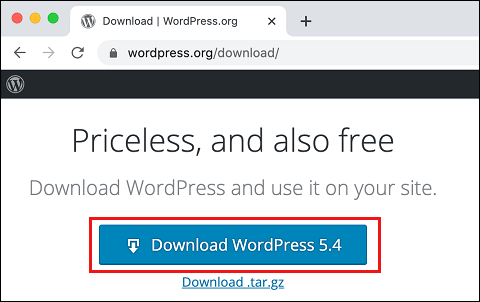
Head over to wordpress.org/download and click on the Download WordPress button to download the latest version of WordPress onto your computer.
Now if you are using a Windows computer, the file will stay in its zip format, which is what we want.
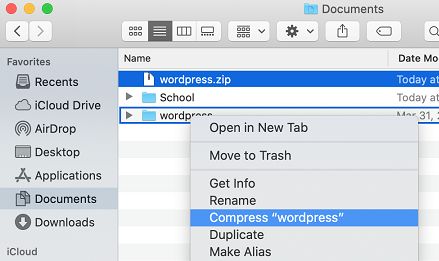
However, if you are using a Mac, the file will automatically be unzipped. To zip the file, simply right click on the WordPress folder and then click on Compress.
Step 2: Upload WordPress to cPanel
With WordPress downloaded onto your computer, next you need to head over to cPanel and upload the wordpress.zip file to cPanel.
To upload the file, we will be using File Manager.
TEXT AD22.1. Enter your domain name followed by /cPanel (example.com/cpanel) and then login to cPanel
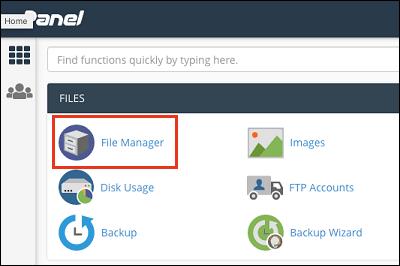
2.2. Once you login to cPanel, click on File Manager
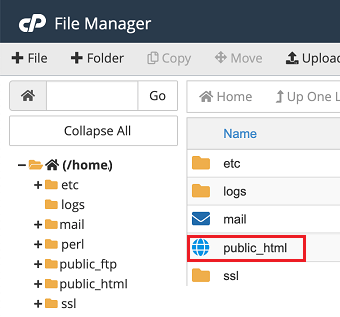
2.3. In File Manager, click on public_html
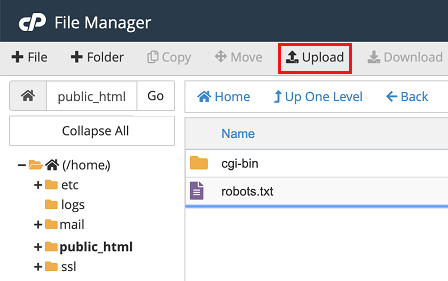
2.4. Click on the Upload button from the top and then upload the wordpress.zip file
2.5. Once the file has been uploaded click on the “Go back to ….” link at the bottom to go back to File Manager.
2.6. Now in File Manager, right click on the wordpress.zip file and then click on Extract to unzip the file.
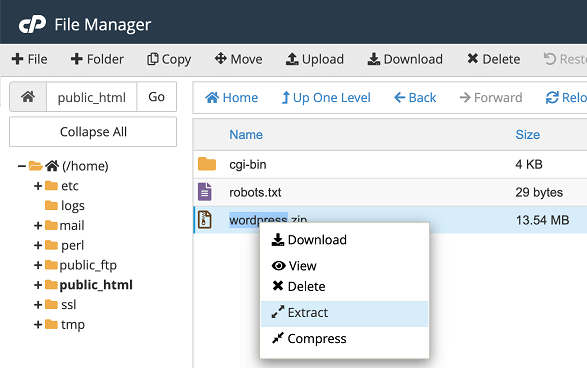
2.7. From the pop-up click on Extract to unzip the file.
Step 3: Move WordPress Files
Now that you have uploaded and unzipped the wordpress.zip file you will notice a new folder in public_html called wordpress.
You need to move the files in the wordpress folder, back into public_html.
3.1. Double click the wordpress folder to open it
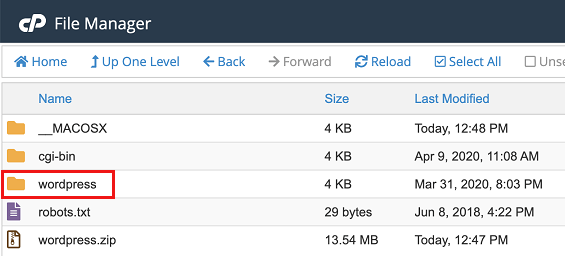
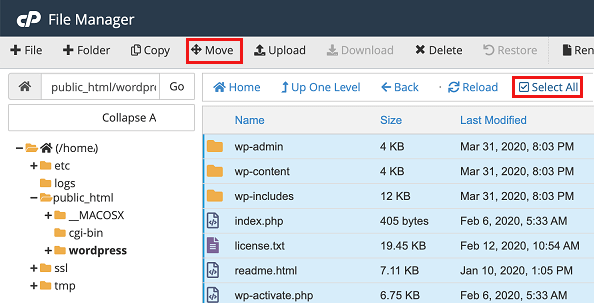
3.2. In the wordpress folder, click Select All from the top menu and then click on Move (See image below)
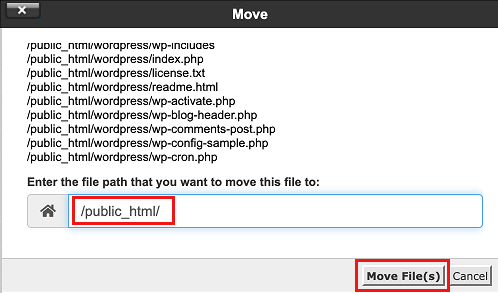
3.3. From the pop-up in the file path section write just /public_html/ and then click on the Move Files button (See image below)
3.4. Click on the back option to go back to the public_html folder and you should now see that the WordPress files have been moved there.
With the WordPress files moved to the public_html folder, you no longer need the wordpress folder or the wordpress.zip file, so the next step is to delete these.
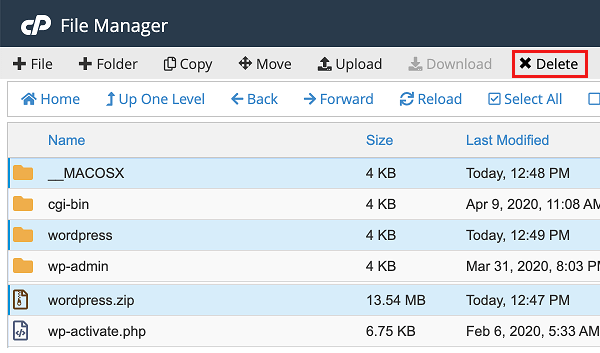
3.5. Select the wordpress.zip file, wordpress folder and additionally if you are using a Mac, select the __MACOSX folder (which you may see).
3.6. Click on Delete from the top menu and then click on Confirm from the pop-up
Step 4: Create a Database
Now the fourth step is one that a lot of beginners are scared of, but do not worry this step is also fairly simple.
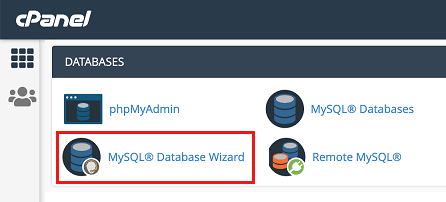
4.1. Open MySQL Database Wizard
Go back to cPanel and click on MySQL Database Wizard option.
4.2. Enter Database Name
Enter in a database name and click on Next Step. This can be any name of your choice as long as you enter only alphanumeric characters (numbers and letters).
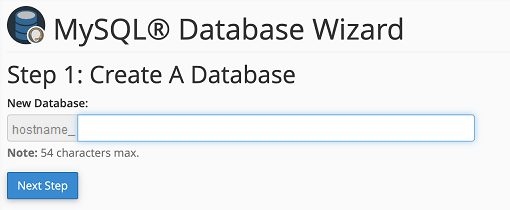
Important: Make sure you note down the database name, it is needed in step 5.
4.3. Create a Database User
Now you will need to create a database user. Enter in a username and password for the database user and then click on the Create User button.
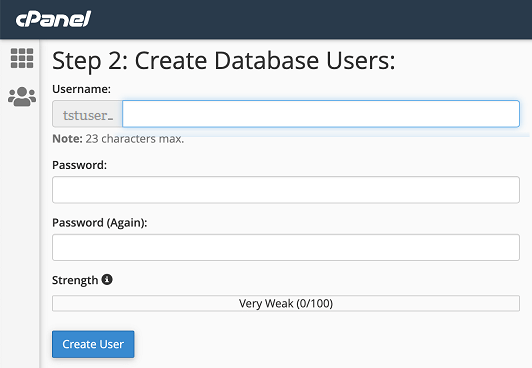
Important: Make sure you note down both the database username and password, which are required for step 5.
4.4. Check All Privileges
Now you will be asked to provide privileges to the user. Select the All Privileges option and then click on Next Step.
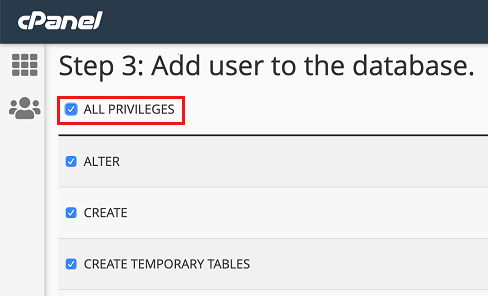
That’s it! You have completed the most difficult part of this install WordPress manually tutorial! All that’s left is step 5, which is completing the WordPress installation.
Step 5: Complete WordPress Installation
Now the final step left is to complete the WordPress Installation.
5.1. Visit yourdomain.com/wp-login.php
5.2. Select your preferred language
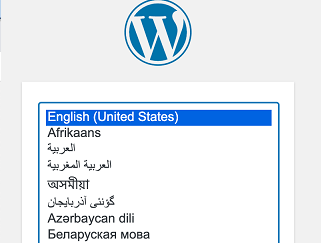
5.3. You’ll see a screen showing the information required for this setup process. Click on Let’s go to continue to the next screen
5.4. In the next step enter in the database name, database username, database password (all of which were created in step 4.2 and 4.3).
Additionally, enter in your hostname, which you chose when you signed up for your hosting.
If you can’t remember your hostname, then simply login to cPanel and click on Server Information from the sidebar (the Server Information option will be located under the General Information heading).
For the table prefix option it’s recommended that you add some alphanumeric characters after wp. For example, you can enter wp45_.
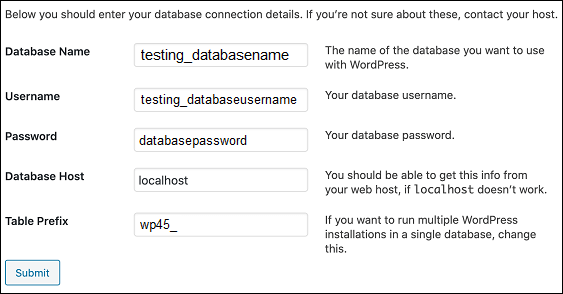
Click on Submit once you have entered all the required information.
Note: Make sure you enter your database name and username with the your cPanel username prefixed. For example, if your cPanel username is testing. You would enter testing_databasename and testing_databaseusername.
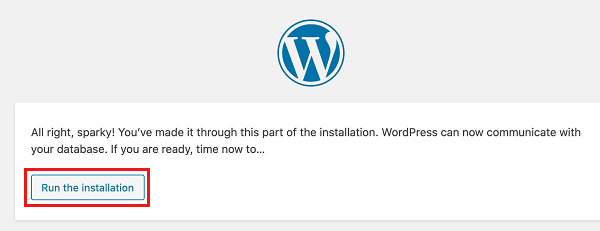
5.5. If the information entered is correct, you are set to go. Click on Run the Installation to continue. If the information is incorrect then take a look at the Note above to make sure you followed the correct naming convention.
5.6. Next enter in a Site Title, WordPress username and WordPress password and an email. If you are still experimenting and making changes to your website, then also check the discourage search engines option, so your unfinished site is not indexed.
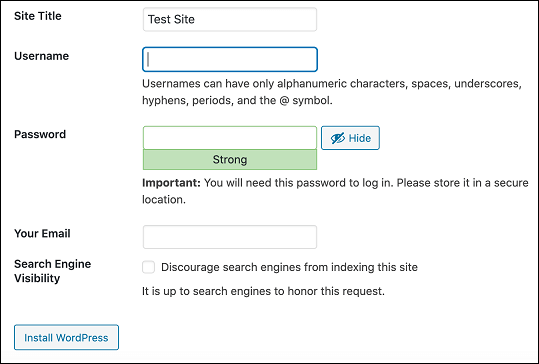
Note down the WordPress username and password, as they will be required to login to WordPress.
5.7. Once WordPress is installed, click on the Log In button to be taken to the login screen.
5.8. Now enter in the WordPress username and password from step 5.6. and you voila you will be logged into WordPress!
We hope this tutorial was helpful!